The summer heat has officially hit the Pacific Northwest. I finally broke down and bought a portable air conditioner a few weeks ago and it was worth every penny (and driving to 3 different Targets near Portland) if only to keep my home "only" 80° instead of 100° or more.
The downside to my comfort is that the dry air conditioned air has left my skin more dried out than ever. As someone who prides themselves on taking good care of their hands it's horrible to see how much my cuticles and hands have dried up in the past few weeks. Thanks, global warming! I moved from San Diego to get away from this kind of heat!
With dried out cuticles and hands that are just aching for moisture, what is a girl to do? Enter Cuticakes!
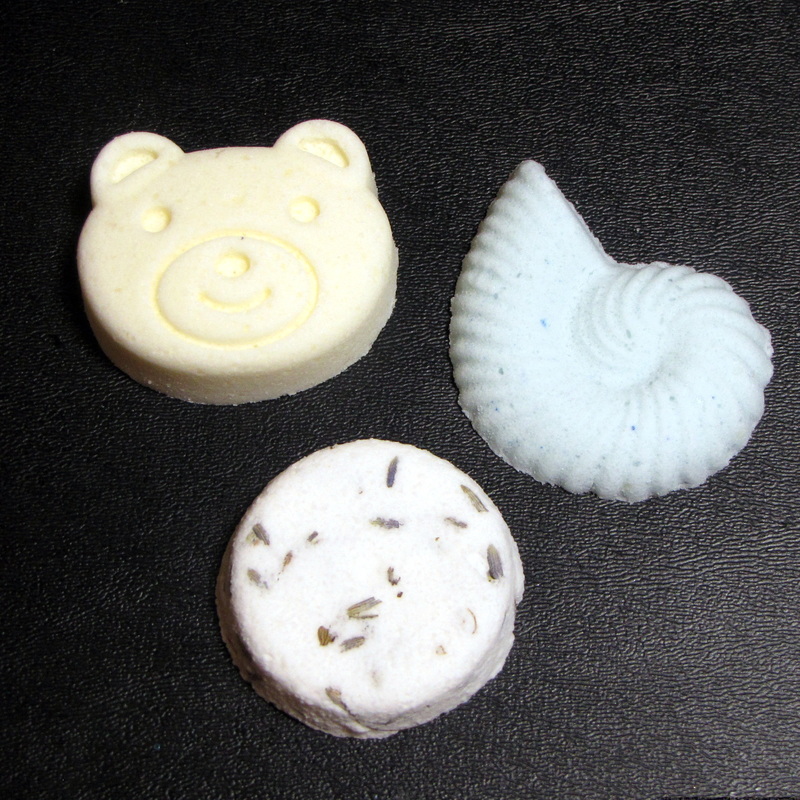
Fruity Bear, Beach Vacation, and Lavender Cuticakes
Mani bombs have popped out of nowhere and both old businesses and new have added them to their shop.
I always shop handmade when options are available and living near Portland and Seattle means that just about anything is available handmade if you're dedicated to looking hard enough! However, taking a chance on a new business can be risky. Cuticakes mani bombs, however, are so reasonably priced there was very little to lose by supporting a new local business!
In the end, the (infinitesimally small) risk was absolutely worth it. My Cuticakes (I just love that name, I can't stop saying it) were shipped very quickly, arrived in perfect condition, and actual shipping costs were darn near spot-on with the shipping costs charged. Even before using them I was very happy with my order.
Each Cuticake was shipped to me in its own little Ziploc bag in case of breakage and the whole group was shipped in a bubble mailer. My goodies arrived just a few hours before beginning a 3 hour drive to Seattle for the weekend, leaving me just enough time to open each bag to smell the mani bombs and think longly about the pampering that awaited me when I got back home.
Finally, the time had come. I was home, my nail polish was completely removed, the water heater had recovered from my hot bath for long enough to fill a bowl to soak in. Now I had to make a decision: which to start with?? I started with the least expensive one, the Lavender Cuticake. It even has real dried lavender in it!
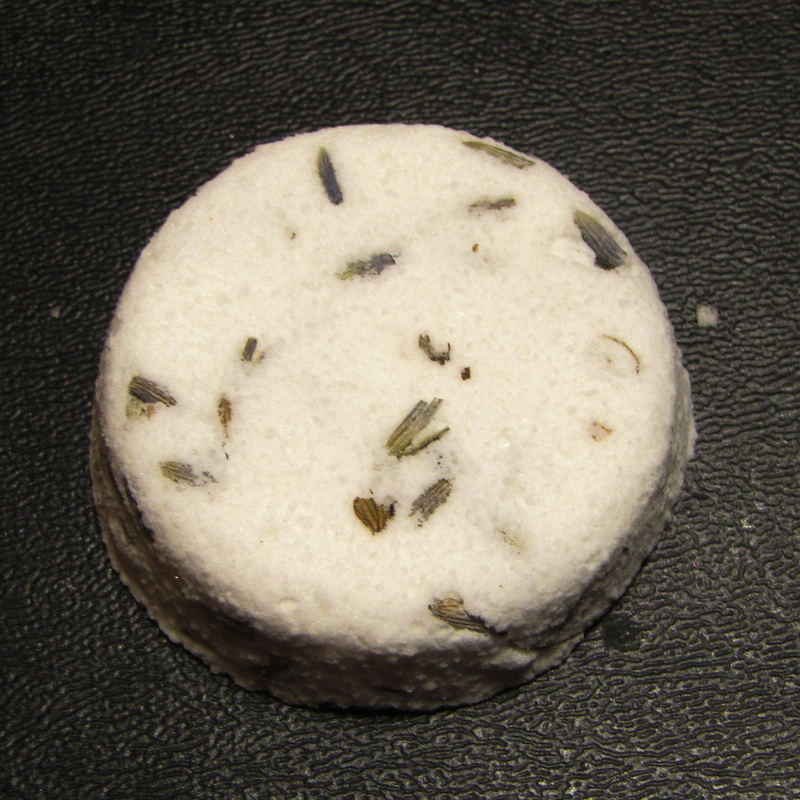
Lavender Cuticake
The scent for this Cuticake was definitely noticeable but not overwhelming. I dropped it into the water and...
Holy cats, listen to that fizz! It took about a full minute for the mani bomb to dissolve, I had fun poking at it to keep it from hugging the edge of the bowl. The directions on the site suggest a 5 minute soak time, just enough time to get into an episode of Bob's Burgers! After 5 minutes was up I rinsed off the lavender bits and dabbed my hands dry. I wiped my palms completely clean to remove the oils and let my hands soak up the remainder on the backs of my hands, my cuticles, and my nail beds.
The only negative comment I have about the Lavender Cuticake is that I zoned out for a minute and forgot about the dried lavender in the mani bomb. I have an extreme aversion to bugs and during my soak I felt one of the flowers on my hand and for a moment I worried it was a bug. It definitely wasn't bad enough to stop me from getting more of the Lavender mani bombs, though. Maybe I should just try remembering what I'm doing instead of focusing so hard on cartoons!
After indulging my hands, it was time to do something about my weary feet. Walking all around Seattle's Capitol Hill is rough on your feet if you're used to sitting at a desk all day.
I knew one mani bomb wouldn't be enough for my feet. I filled a tub with just enough water to cover my tired toes and dropped in both the Fruity Bear and Beach Vacation Cuticakes.
 Fruity Bear Cuticake | 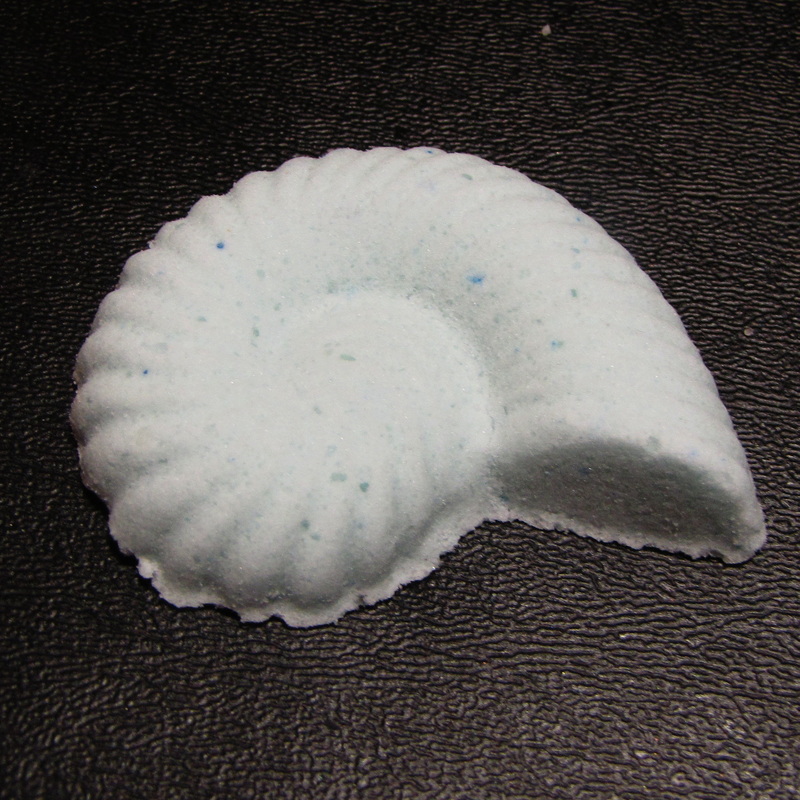 Beach Vacation Cuticake |
The description for Fruity Bear says it smells just like Froot Loops but I was not prepared for it to smell exactly like Froot Loops!! I'm honestly proud of myself for not licking it just to see if it tasted like Froot Loops, too, I'm pretty sure it wouldn't have, anyways.
Since I was soaking my feet in these mani bombs I wasn't able to enjoy the scent while I soaked, sadly. I let my feet soak in the bombs for way more than 5 minutes to allow the oils to permeate my tired feet. I honestly felt so rejuvenated after my pedi soak, I could have walked all around Capitol Hill again! ...but let's not. After about 15 minutes of soaking I patted my feet dry and reveled in the softness of my (often dry) feet!
At the end of the night I was left with very happy hands and feet, and all for way less than the cost of a mani/pedi at a nail salon!
Final Score
Coverage: N/A
Application: N/A
Price: 5/5
Originality: 5/5
I love it when I try out a new brand or product and I'm struggling to find anything negative with the experience! Especially since this business is only a 2 hour drive from where I live I know that I have a go-to shop for when I need mani bombs in the future.
Application: N/A
Price: 5/5
- Each mani bomb costs between $.55 and $.85 which is the best pricing I've seen. Shipping costs are extremely close to actual shipping costs; shops severely overcharging on shipping is a big pet peeve of mine!
Originality: 5/5
- While there are many brands coming out with their own mani bombs I think that Cuticakes has some very original scent and shape ideas!
I love it when I try out a new brand or product and I'm struggling to find anything negative with the experience! Especially since this business is only a 2 hour drive from where I live I know that I have a go-to shop for when I need mani bombs in the future.
*These items were provided to me for review. The above opinions are honest and unbiased, please see my disclosure page for more info*


 RSS Feed